If somehow or someway, the job of theming content has fallen to you. Theming content is generally reserved for the more creative types, but if you don’t have the luxury of having artistic talent or access to someone that does, then this blog is here to help you out.
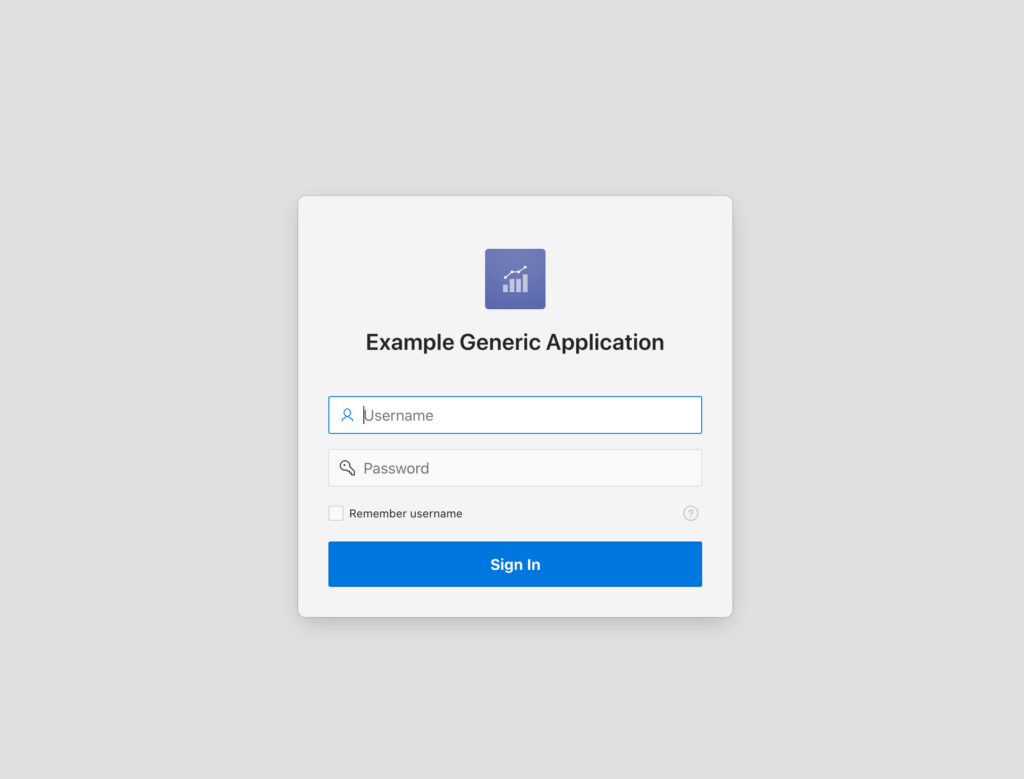
- To begin, create a new blank APEX app. The login screen will look something like this:
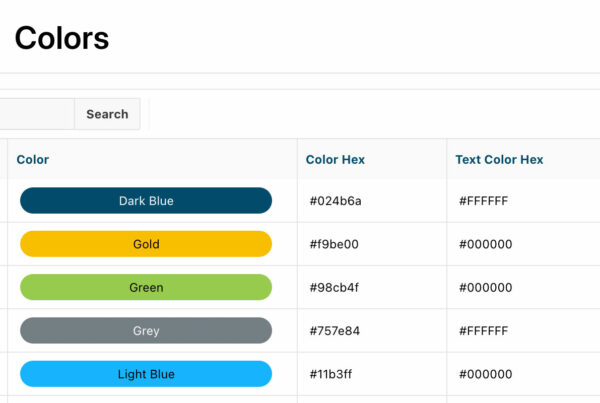
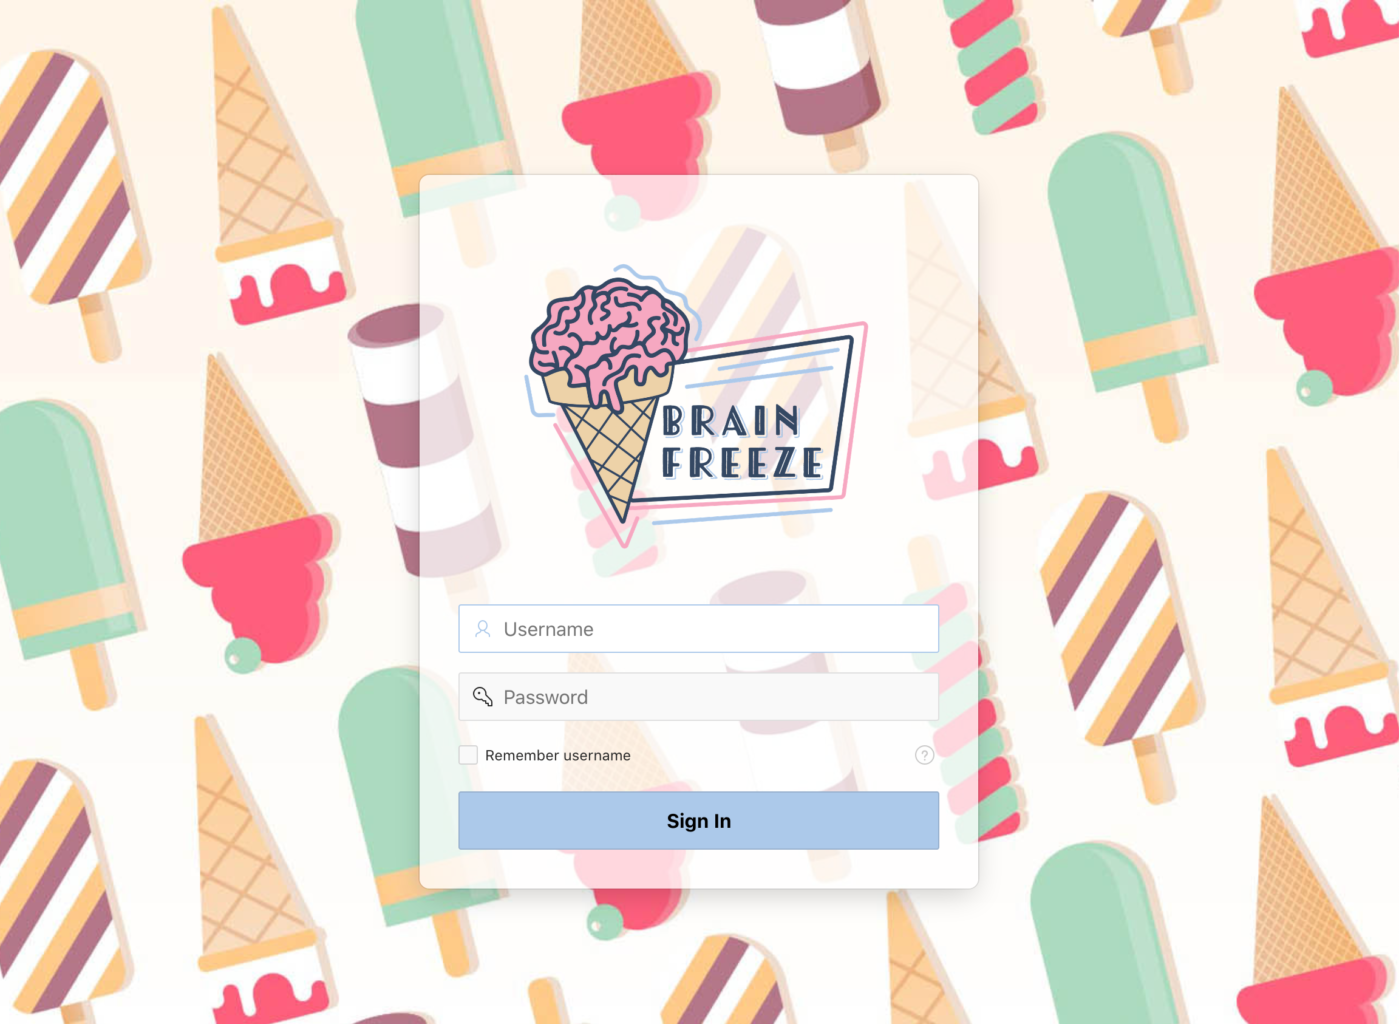
- For this blog, you will need a logo image and a large background image. If you don’t have one, head to a search engine and grab some. I decided to go with an ice cream themed application for this example.

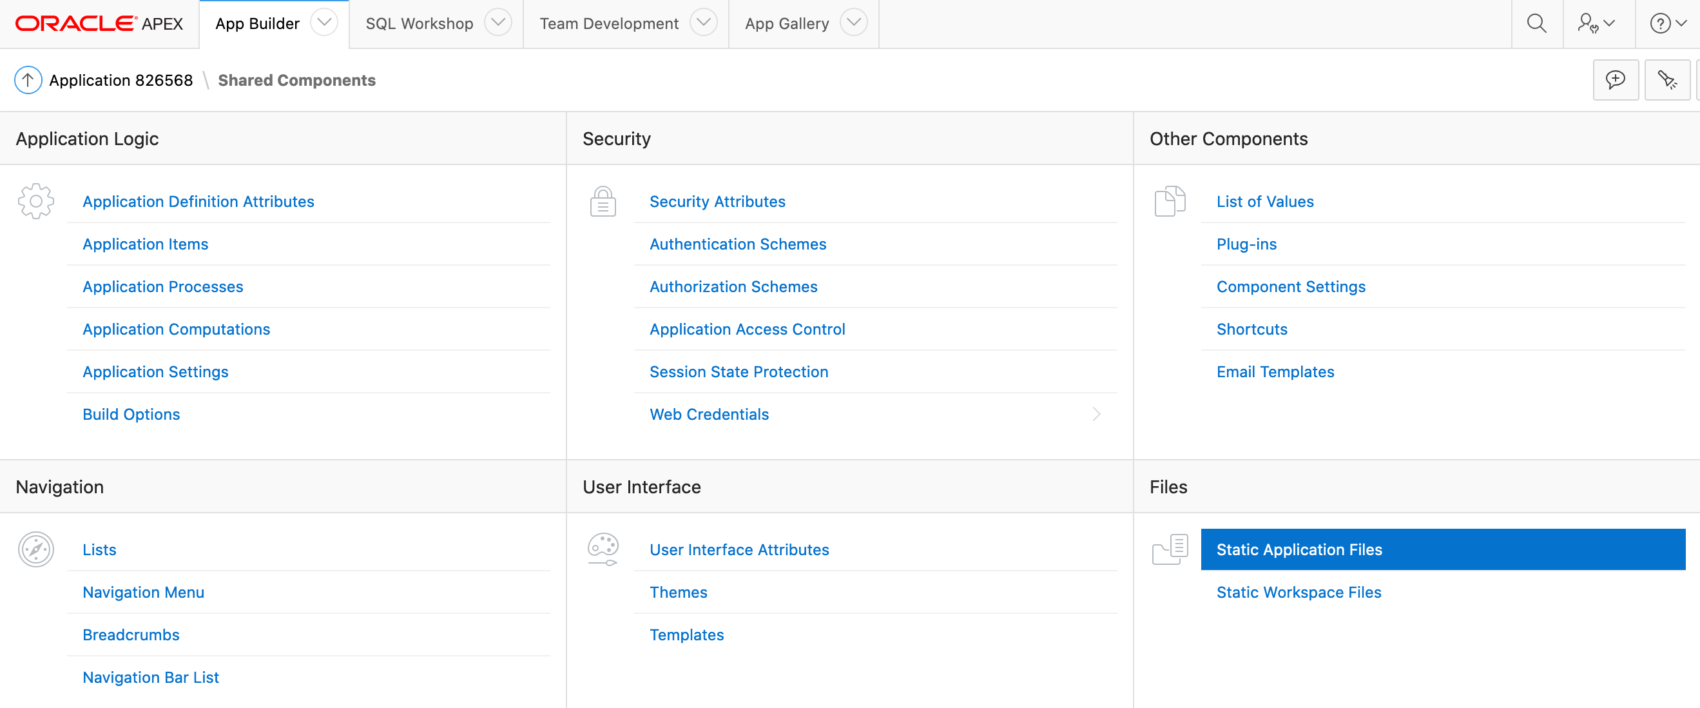
- Navigate to Shared Components and click on Static Application Files.
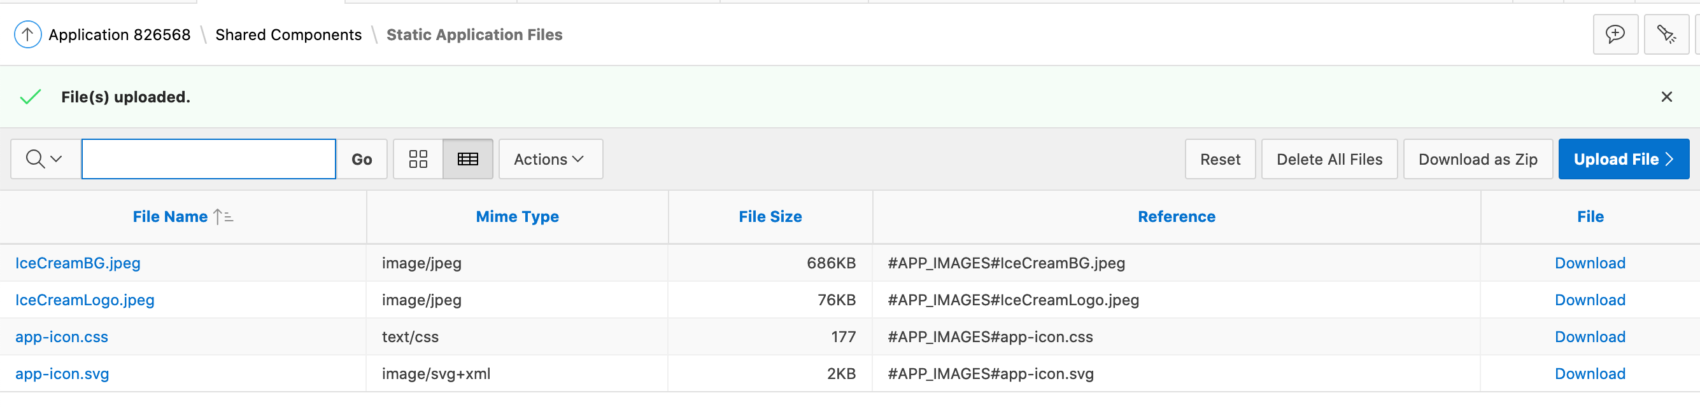
- Upload your files and make a note of the text in the Reference Column. When we use CSS later, we will be referencing those file paths.
- Go back to your application and click on the Login Page
- With Page 9999: Login Page selected in the left pane, scroll down in the right pane until you get to the CSS Section.
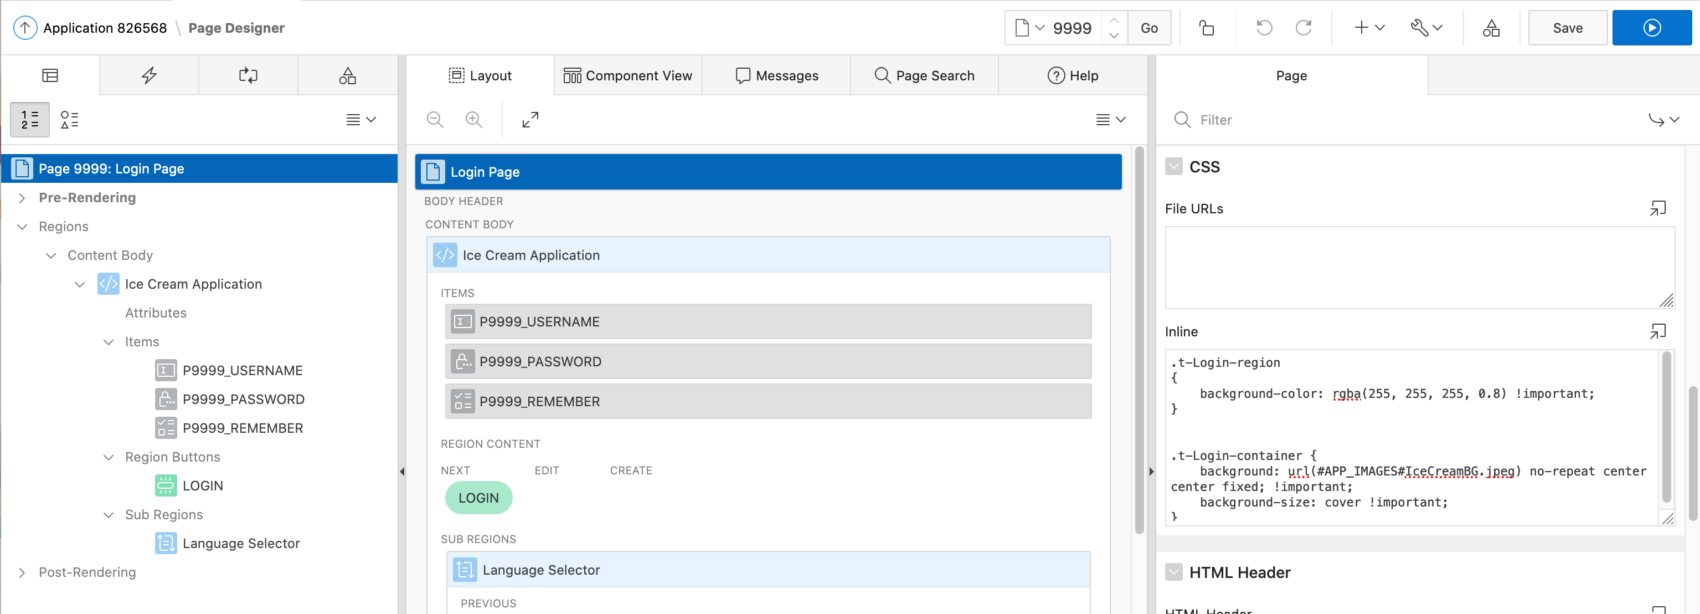
- Add the code below to the Inline text area. Remember to change the #APP_IMAGES# path to your own.
.t-Login-region {

background-color: rgba(255, 255, 255, 0.8) !important;

}

.t-Login-container {

background: url(#APP_IMAGES#IceCreamBG.jpeg) no-repeat center center fixed; !important;
background-size: cover !important;

}
- In the left pane, click on the region in Content Body (mine is named Ice Cream Application). With the Content Body region selected, scroll down in the right pane until you reach the Appearances Section.
- Delete the “app-icon” text next to Icon
- Click on the Use Template Defaults button
- Change the Login Header select list to Hidden
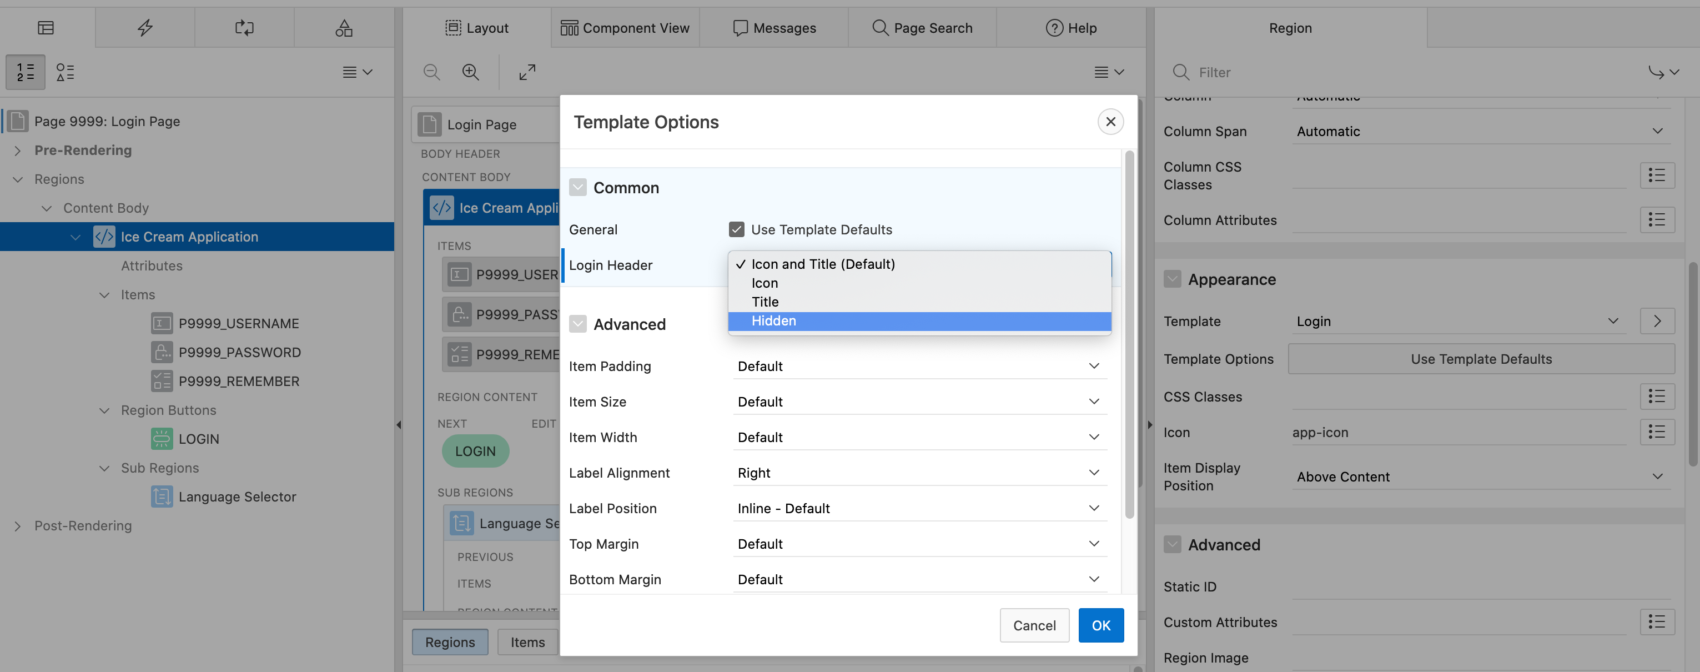
- Click the OK button to exit the Template Options pop up. Continue scrolling down on the right pane until you reach the Header and Footer Section.
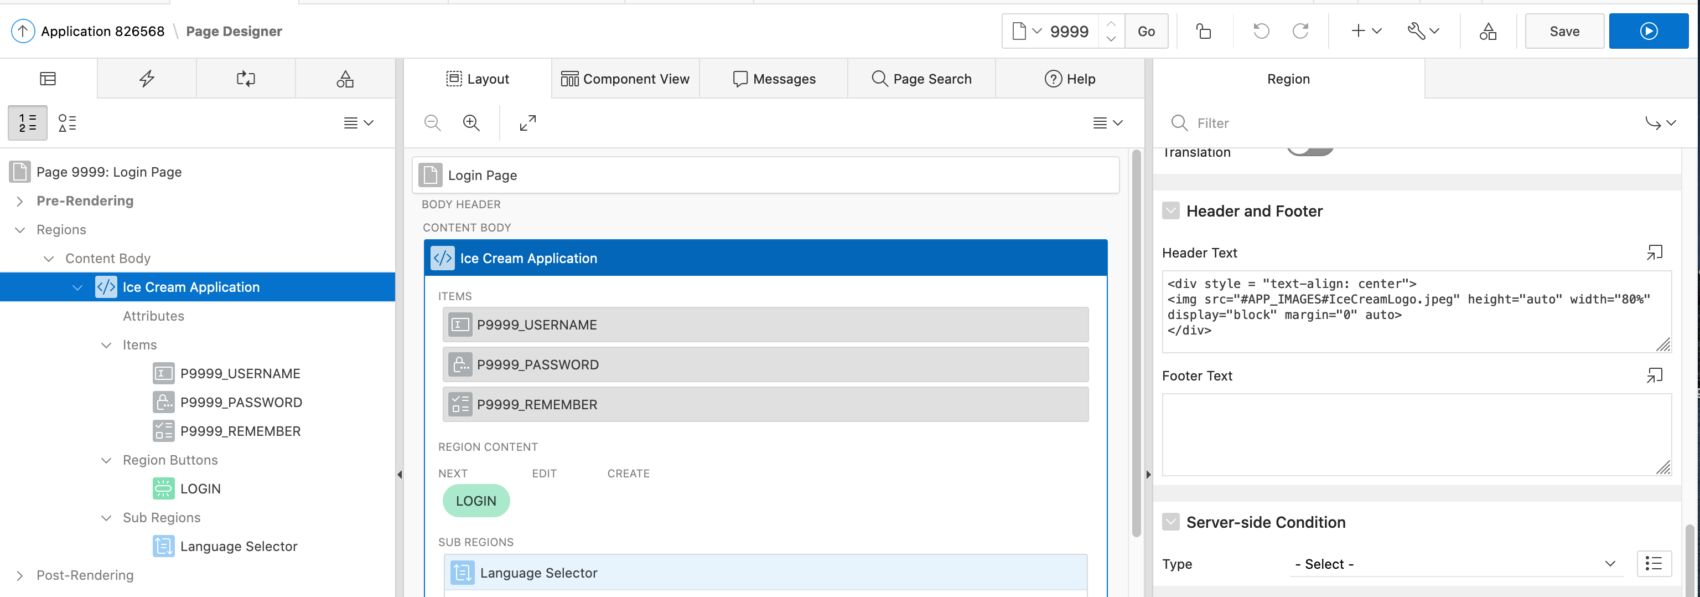
- Add the code below to the Header Text area. Again, remember to change the #APP_IMAGES# path to your own.
<div style = "text-align: center">
<img src="#APP_IMAGES#IceCreamLogo.jpeg" height="auto" width="80%"
display="block" margin="0" auto>
/div>
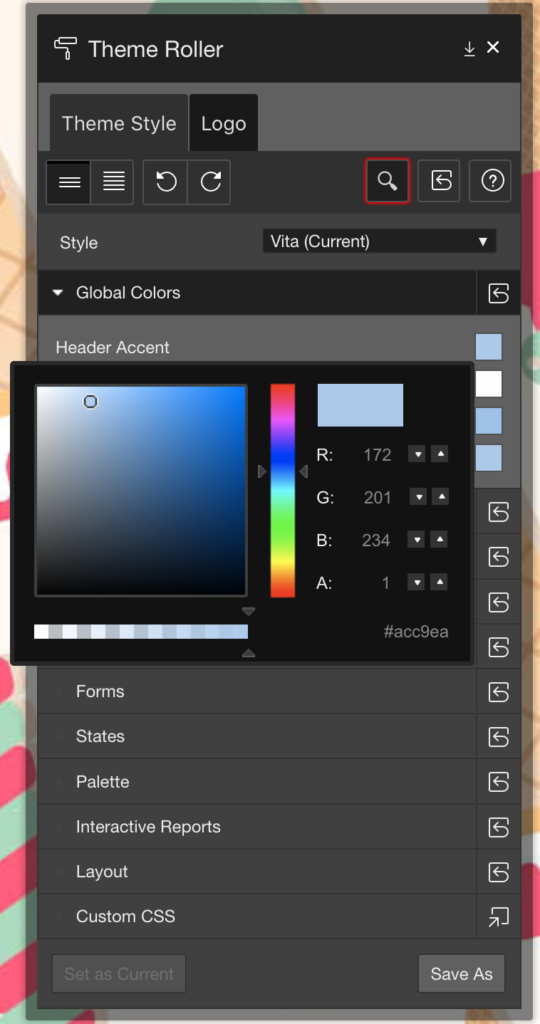
- Save your changes and run the page. Click on Theme Roller and then the Header Accent color box. Choose a different color to match the color scheme of your images. Save the theme and click the Set as Current button.
- Bask in the glory that is your newly themed login page.
Requirements:
- APEX 18x or higher
Disclaimer:
We do not take responsibility for any unintended or unwanted consequences in your instance of Oracle, Oracle APEX, or related products as a result of reading our blogs or following our guides. Though the information is fully tested and generally safe to use, our lawyers really have a thing against admitting potential wrongdoing. This is usually the part where I share a prank I pulled on our lawyers, but in light of grabbing “free” images online and the potential backlash, I think it is better that I address that here. For the record, I own and created all the images, gifs, games, songs, movies, videos, podcasts, and websites that existed in the past, are currently in existence, or will exist in the future. It wasn’t easy creating all that content, but I did so for the express purpose of making it readily available for the public. Just kidding, I did it so I could laud something over everyone and sue anyone that dares to use it; regardless of how much credit they give me or how obvious it is that they did not create it.